Wednesday, February 10, 2010

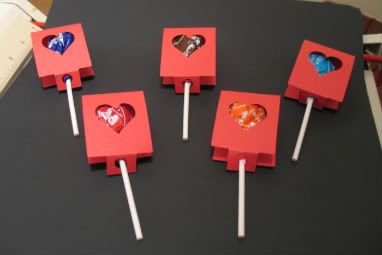
Valentine's Tootsie Wrappers


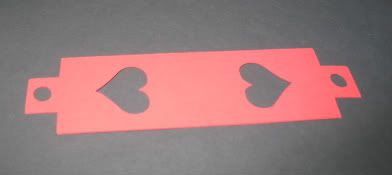
A very fast and easy way to cover up a Tootsie Pop for Valentine's Day. I finished 42 of these in under 45 minutes. I can also see interchanging the heart with other shapes for other occasions. Hope you enjoy making a few of these yourself! Oh yeah, I used Plantin Schoolbook for these.

Sunday, January 10, 2010

A Tri-Shutter Card


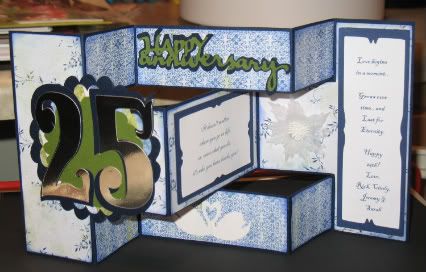
This was my first attempt with making what some people call a Tri-Shutter card. It was very fun to make and the embellishing options are endless since there are so many faces of the card to decorate. This one was made especially for my brother and sister-in-law's 25th wedding anniversary (and their last name is Swan - hence the swans on the card). I really like the way it came out and I can definitely see many more of these cards in my future.

I downloaded a cut file for the card from Okieladybug's craft blog (a link is in my sidebar to her blog) but you can also make these fairly easily without the file and using a Scor-pal (a link to their site is also in my sidebar).

If you have not tried one of these cards yet, what's stopping you!

Wednesday, December 23, 2009

My 2009 Christmas Cards


This year I made 62 cards for friends and family. The Santa and Snowman are both paper piecing patterns that I bought from http://myscrapchick.com and the holiday word tree is a file I created with my Cricut and the Storybook cartridge. I hope everyone that received one truly appreciated all the hard work and love that went into making these! Happy Holidays to everyone!

Sunday, November 22, 2009

Thanksgiving Place Settings

My final project for my first day back - not too bad - two pies and 20 place setting cards - a rather productive afternoon!

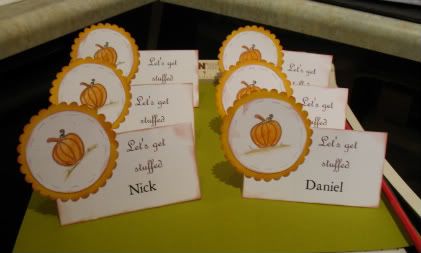
I made 20 of these simple place setting cards. I actually goofed and they were supposed to be half the size - but when I printed the saying, I didn't adjust it to fit the lower half. Oh well, made them work anyway! A very basic watercolored stamp and a double layered scallop circle complete the look. They read..."Let's get stuffed" and the person's name.

Tomorrow working on simple centerpieces...I hope!

My Thanksgiving Pie Favors


These cute pie favors are what my guest will be getting this Thanksgiving. Each one holds 6 Hershey Kisses or for my niece, Vanilla Teddy Grahams. It takes 10 pieces to make a whole pie. One is pumpkin and one chocolate cream. The favors were made using the Big Bug, Tags Bags Boxes and More and George cartridges. I am very pleased with the final project! Thanks for looking.

After a long absence...

WOW! After taking almost 4 months off from blogging and crafting in general I am back...and boy does it feel good! It was a very busy summer and fall...our first year with bees was a very interesting one...and very rewarding. All said and done, we harvested 132 lbs. of delicious wildflower honey, not to shabby for 1st year beekeepers. Now on to crafting....

Thursday, August 6, 2009

M.I.A. So Far This Summer

Feeling sorry to be neglecting my blog for so long. This summer has been a very busy one for me working in my house, cleaning out clutter and re-modeling a few rooms. FINALLY seeing the light at the end of the tunnel and almost ready to get back into my craft room! I really need to start working on my Christmas Cards...as fast as this year has gone so far...Christmas will be here before you know it! SEE YOU ALL SOON!

Sunday, July 5, 2009

Thursday, July 2, 2009

Gate Fold Wedding/Anniversary Card


Here is a card that I have made several times now and thought I would share - it is a 6x11.5 gate fold card - made especially for a wedding or anniversary. The cartridges that I used were the Paper Doll Dress-up and George & Basic shapes. The file is sized so that the dolls will fit perfectly inside. I have grouped together the items that I wanted to cut out of the same color papers. I hope you like the file and enjoy making one of your own! By the way I also designed an envelope (made with George) and you can find that in my next blog entry!!

Envelope for Gate Card

Here is the envelope that I created to fit the 6x11.5 gate card. It was made using George.


Envelope - My 6 x 11 Gate Card - george.cut

Friday, June 19, 2009

Happy Father's Day!

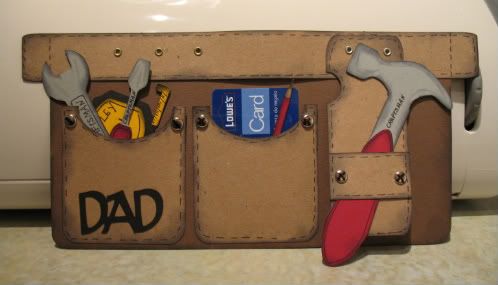
These are the Father's Day Cards that I will be giving to my Dad and Dad-in-Law. A huge thank you to Ruelysi Creative Cards for sharing her cut file on her blog. The tool belt and tools were all made using the Cricut and the George cartridge. I am sure that something similar to this could also be done in SCAL.
(Please go check out Ruelysi Creative Cards if you haven't already. She is not only very talented, but also very generous with her cut files!)
I knew when I saw these that they would make perfect Lowe's Gift Card holders. I am really pleased with the way they turned out!

Saturday, June 13, 2009

This Was My Biggest Project Yet!

This most definitely was my biggest project I have yet to work on. At last count I had over 30 hours into making this ABC Baby Album. It was a gift for a co-worker expecting her first child on June 16 - she is the type of person who appreciates something "homemade" and can also understand and appreciate the time it takes to make something like this.
I made the book with the mindset that new parents are very busy and often don't have the time it takes to document the special moments in their first child's lives until later (yep, that was me, scrapbooking my kid's baby albums when they were in their early teens - LOL).
So I thought I'd give her a head start with an album all set to add the pictures!
She's a teacher - so the ABC theme was perfect. There is a page designed for each letter of the alphabet and a cute saying to go along. I then added three individual paper piecing pictures for each letter - some letters boggled my brain for a "cute" design appropriate for a baby book. Most of the piecings were cut by hand, as they were tiny and I found this actually easier than cutting them on my Cricut. Many of the patterns came from an ABC Paper Piecing Booklet that I purchased from Paperwishes.com for only $3.99 - well worth the money! Below is a link to a slide show of the book - I hope you enjoy browsing through the pictures and take time to leave me a comment! It is the comments left by you that continue to make me want to keep posting and sharing files that I create!
My ABC Baby Album

Here is a link (hope it works) to Photobucket, where the slide show will play. (I hope)http://s92.photobucket.com/albums/l16/cheezer_02/Baby%20Book/?albumview=slideshow

I've Gone to the Bees!


Well, on May 16th our two packages of Honey Bees arrived. Bees are very interesting little creatures to say the least. I now clearly understand the meaning of the phrase...Busy as a Bee! Poor little things literally work themselves to death. This ia a picture of one of the hive frames about 3 weeks after the bees were installed. They are already very busy building out the frame combs and her royal highness, Queen bee, is very busy with her only job of laying eggs. The bees are so cute when their hind legs and pollen sacs are full of pollen - I call them "The Cheetos Girls" because they look like they are carrying Cheetos on their legs - LOL
I'll update now and then on their progress - and hope to stay free of stings in the meantime! So far...so good!

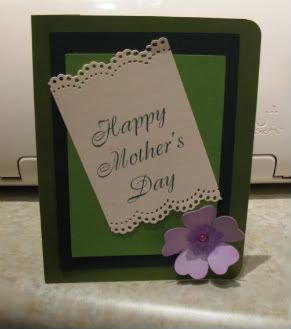
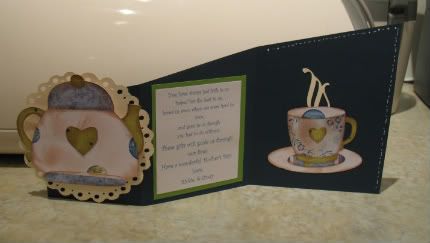
Mother's Day 2009


Yet again I could not decide what to make for Mother's Day cards.... so I made and gave two. The first is a "Z" card inspired by cards that I have seen on Angel Stamper's blog. The teapot and teacup are paper piecing patterns that I duplicated in Inkscape and made into svg. files so that I could cut them using my Cricut machine.
The pop-up flower card is a file that ScrappedLives was so kind to share! It is a beautiful card to put together! You should check out both of these blogs for more of their creative projects! I think both my mother and mother-in-law liked both of their cards!

Teagan's First Birthday Cards


So far I have these two cards that I made to choose from for my niece's 1st birthday. The first is a little girl outfit card which I made using a pattern and SCAL. The front of the card is the side with the bunny in the pocket and the back has the rubber ducky sticking out the back pocket.

The other is a paper piecing teddy. I think I may even work on a few more before I decide...that's one problem I always have when I sit down to make something....I always think I can make something better than the last. (This is how I usually make and sometimes give more than one card)! Thanks for looking!

Kaylee the Tear Bear

Meet the newest addition to my tear bears. My daughter was getting upset that I was making all these cute bears and giving them away on cards. So I made one especially for her. I think she looks darling in her pink and white gingham outfit. I actually used some tulle from the slip
that I wore on my wedding day to accent the top. These bears are very addicting.

Sunday, May 10, 2009

Just wanting to wish a Happy Mother's Day to everyone who happened upon my site today! Enjoy your day - I'll be spending some of mine crafting, of course!!

Wednesday, May 6, 2009

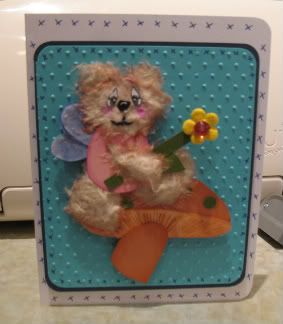
Felicity the Fairy Bear

My daughter's boyfriend asked me if I'd make a card for his mother for Mother's Day. (He actually asked me what I would charge for a card - LOL - like VISA homemade cards are priceless!)
His mom loves fairies so I thought this cute "Tear Bear" fairy bear would be perfect. She was the smallest one that I have made so far, and I am finding out the smaller the harder! She was fun to make though and I am happy with the way she turned out!

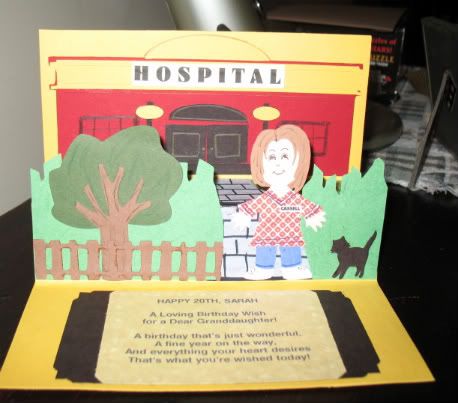
A Card by My MOM

Since she won't post her work .... like any good daughter, I'll post it for her. This is the absolutely adorable card that my mother made for my daughter's 20th birthday. My daughter is currently in school to become a Medical Assistant and her card is perfect! I am not sure how well the picture does it justice...it's 3-D! I think you did a FANTASTIC job on this card mom (yes, I know you'll read this sooner or later). I am sure that Sarah will cherish it for years to come! Mom, you should be very proud ~ you are one very talented lady! Love You!