Showing posts with label Boxes. Show all posts

Sunday, November 22, 2009

My Thanksgiving Pie Favors


These cute pie favors are what my guest will be getting this Thanksgiving. Each one holds 6 Hershey Kisses or for my niece, Vanilla Teddy Grahams. It takes 10 pieces to make a whole pie. One is pumpkin and one chocolate cream. The favors were made using the Big Bug, Tags Bags Boxes and More and George cartridges. I am very pleased with the final project! Thanks for looking.

Thursday, April 9, 2009

Bunnies, Bunnies, Bunnies!


Last night I spent about 6 hours making these tiny treat boxes for the 36 children, in the two classrooms where I am a remedial paraprofessional. I re-created a bunny face and feet designed by Jody P. (from the Cricut Messageboard) and designed my own teeny treat box with a window. I filled the boxes with Smartie candies.
They were truly a labor of love! Nothing justifies spending hours crafting like the smile and genuine thank you of a child!

Easter Baskets


I made crafty Easter Baskets for my older children this year. They know that their mom is a Craft Addict, so they should expect nothing less! The basket is from Mel Stampz blog - http://melstampz.blogspot.com/ - it is called a Rolling Hills basket. If you aren't familar with her blog - go check it out!

The sheep is from Paper, Scissors, Ink - http://www.paperscissorsinc.com/ - and you should definitely check out her blog too!

So as you can see, I can't take any credit for the design of this one - they were definitely a lot of fun to make though!

Thursday, March 26, 2009

My Version of a One Cupcake Box


There have been many versions of the cupcake box bouncing around - here is mine. It will hold one, very nicely decorated cupcake. There is a front cutout for viewing the cupcake when the box is closed. Again this cutout could be interchanged with other shapes, as long as it remains the about the same size.
I'd love to see your creations!

A Box W/Attached Cover

Another box - one can never have enough boxes, I say - saw a similar one on Angel Stamper's blog and had to recreate one for the Cricut. I used a bunny cut out for the front of mine, since Easter is fast approaching; but any shape can be interchanged. Since it's not too big, I was able to make it within the 6x12 mat for the Baby Bug too! Enjoy!

My Love of Boxes Continues...


Here is rather cute, larger box for holding anything you desire to fill it with. It has a front cutout - which you could switch out for different occasions. It measures about 5" wide by 2" deep. This one is a little too big for Baby Buggers (sorry) and was made with Plantin Schoolbook. (This has been my cartridge of choice for making cutfiles with lately)

Mini Bon-Bon Boxes


These Bon-Bon holders were actually modeled after ones that I saw on the Scor-Pal site, Feb. 09 E-zine. They would probably hold a couple nuggets or something similar in size. Both holders are on the one file. They were made with Plantin Schoolbook with the Baby Bug mat. There is a page for both showing the scoring lines so be sure NOT to cut that page when making some! Enjoy!

A Big Bon-Bon Box


If you checked out Scor-Pal projects lately, you'll see in the Feb. 09 E-Zine, that this BonBon Box was made strictly using a Scor-Pal. I figured why not try to duplicate something similar with the Design Studio. Much easier to cut!

This is the larger - with the base measuring just about 2 1/2" square. Probably big enough for a Reese PB Cup. (Of course there is NO chocolate in my house when I need it!-LOL)

Made using Plantin Schoolbook - since I figured more people have that than George!

A Tiny-Teeny Box


I saw a similar box on Angel Stamper's blog and thought this would be easy to recreate in Design Studio. It's a cute little box for holding just the right amount of tiny treats. The finished box measures only 2" x 2". There are two files - one for George and one for Plantin Schoolbook. (Both on one file) It is Baby Bug compatible!
I think I will be making these for the kids in my classes - not too big and not too hard to make!

Boxes - My Candy Box.cassell.cut

Sunday, March 8, 2009

Stepper Box


I found this wonderful box while surfing the net for ideas. You can find a great detailed tutorial to make one here:
http://stampinterri.typepad.com/stampin_terri/files/fantasy_keepsake_boxes.doc I did make a cut file for all the different sized boxes you will need, although a file for this is not really needed unless you are going to make them in a large quantity. I used just my regular paper cutter to make mine! The cut file was made in George, but can easily be made in any cartridge that has a square on it.
Just wanted to share a really fun, fairly easy box to make that I think is just too cute once assembled.

House Box/Bank


Here is a cute box which can also be used as a bank. Just be sure to use really tacky tape if using this as a bank. I love Terrifically Tacky Tape for all my projects that I really need a good adhesive. I'd love to see what anyone does with this file as the embellishing ideas are endless!

Some hints for assembling:

I found it easier to embellish the house box before gluing it together because I could push the pieces down much harder than if it was already in its box shape. When scoring the scallop roof edging, score the short side at 1/4" and then turn and score the long edge at 3" (since the edging is 6" long this is half). Cut from the scalloped side just til you reach the other score mark NOT all the way through. This will allow the edging to bend over each other.

When gluing the roof on, I carefully place my hand inside the box from the bottom and this allowed me to put pressure on the house roof tabs onto the roof piece itself.

(Hopefully this wasn't confusing!)

Sunday, February 15, 2009

And the 3 Nugget Purse...


Here is the 3 nugget purse. This one, the top of the purse can actually tuck inside the box. (I couldn't wait to post - so I could eat the nuggets - LOL)

New Ways to Give Nuggets -


Yes, Nugget Purses...
There was a tutorial for making these over at Inspirational Techniques & Tutorials.blogspot.com. Of course they were made all by hand. Well, I just couldn't leave well enough alone, and created two cut files. One for a 2 nugget purse, and one for a 3 nugget purse. I think they are just darling!

This one is the 2 nugget purse. The closure on this one is a tiny velcro dot.
Nugget Boxes - My_2_nugget_purse.cassell.cut

Friday, February 13, 2009

What I Worked On Today...Part Two...

The second project I finished today was this Valentine for my daughter. I used the file from Carla over at ScappedLives. The file is for a multifunctional holder. There are many pockets to make and add, inside and/or out. Inside I only added one pocket for a box of Andes mints. I just love this file - Carla is one very talented lady! You should hop on over to her blog - there is a link to it under my "Gotta Love These Blogs" section over on the right hand side!

Milk Carton & Carrier

Here too, is my version of a carrier with 4 tiny milk cartons. I actually have not made any myself (now what's wrong with that picture) other than the sample one I always cut before sharing. But, I added two links to the Cricut Messageboard and two fabulous projects that were created using this file. There are different versions of this carrier made in different sizes, so do some digging if this one isn't right for you! I've included this picture to help you with the scoring of the top of the milk cartons.

Check out what these two very talented ladies made using this file. Thanks ladies for sharing with me!

http://www.cricut.com/messageboard/tm.aspx?m=3987623
http://www.cricut.com/messageboard/tm.aspx?m=3983329


Boxes - My milk carton and carrier (4).cut

Oragami Box


Head on over to http://www.scor-pal.com/projects.htm and check out their projects section. All of these projects DO NOT require a cutting machine, like the Cricut, to complete. Most of them are fairly easy to make. This is just a sample of one of their boxes. It was made from one sheet of 12x12 paper. I really liked the way it opened. Sometimes, I still enjoy doing projects the old fashioned way - without my fabulous Cricut!

Small Party Favor

Here is a small party favor that I created to be used for any special occasion. It can be filled with small candies or treats. When finished, it measures about 5.25" x 1.25" . I think one would look great at each place setting for a party.
Made with GBS cartridge.

Tuesday, January 20, 2009

Love, Love, Love Nugget Boxes

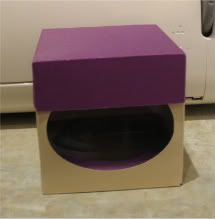
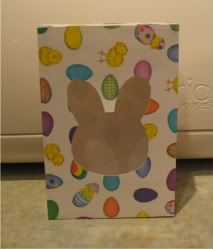
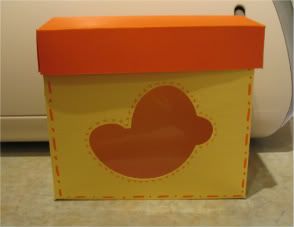
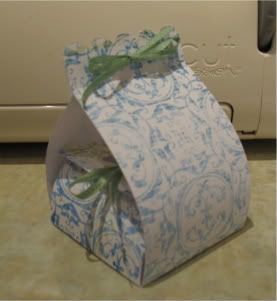
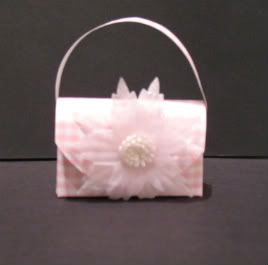
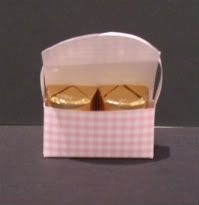
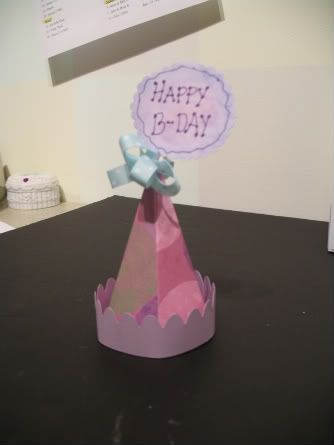
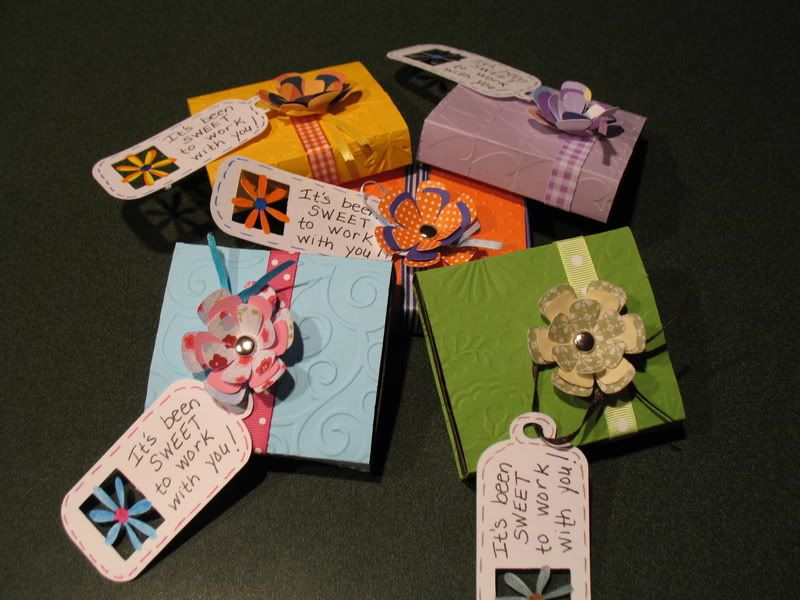
Here are just a few of the nugget boxes I have made. I just love these for any occasion! But then again, I am addicted to boxes!
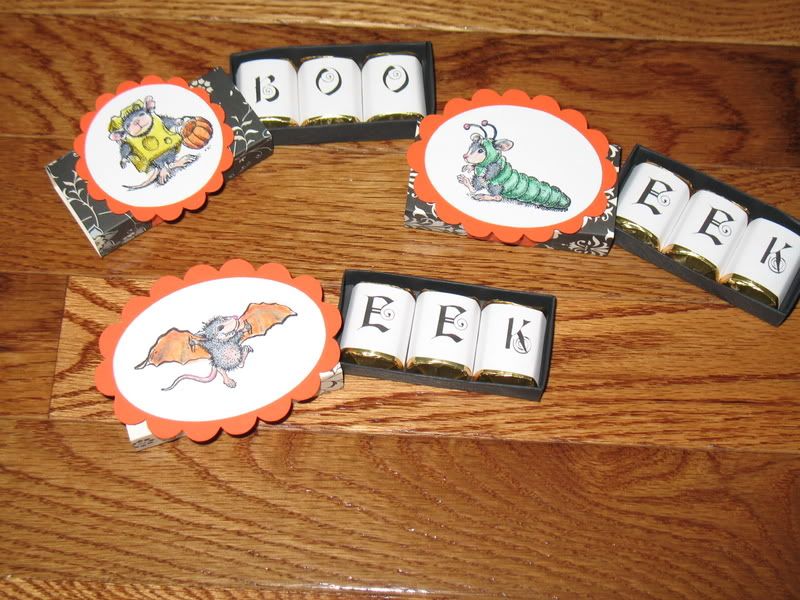
I've given them to the teachers I work with at the end of the year ("It's been SWEET working with you" on the tag), made them for Halloween, used them at my kid's birthday parties (w/their baby pictures printed on labels and stuck over the nuggets), and given them for prizes for games played at showers.
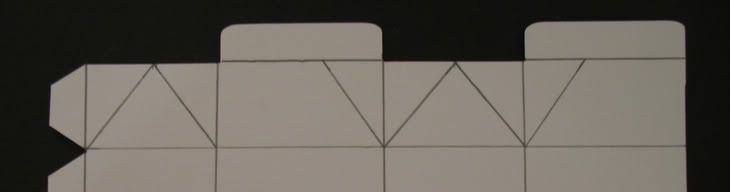
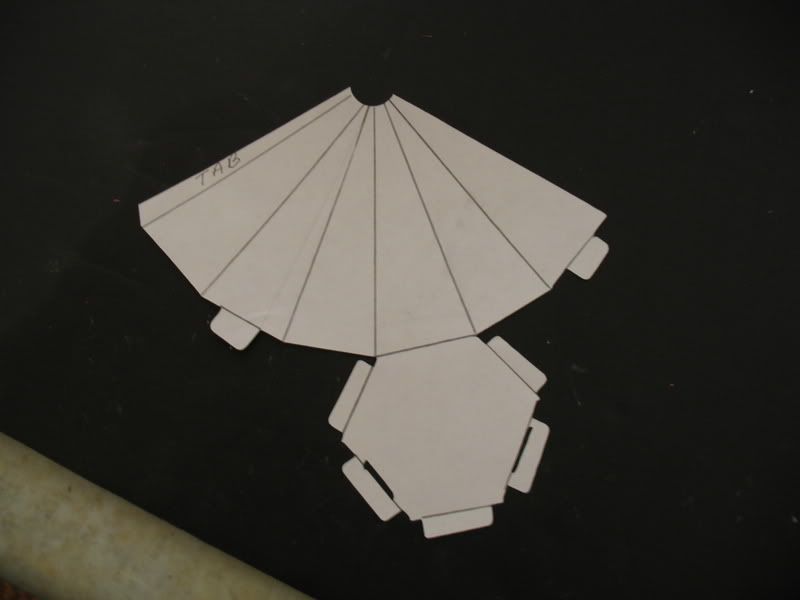
They are pretty easy to assemble and no matter what size, all assemble in the same fashion. Below are some of the cut files I have managed to make for these. There is also a cut file for the tag, made from the WIMG cartridge. As of now, you will need the Big Bug to cut these (I will be adjusting my files shortly to accommodate the Baby Bug too!!)
Hope you enjoy!

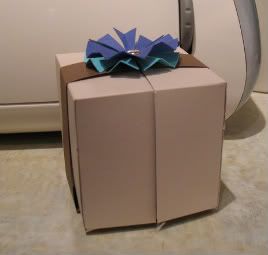
I wanted to share with you some nugget boxes Debbie made and posted on the Cricut Messageboard - Great job Debbie!
http://www.cricut.com/messageboard/tm.aspx?m=3985471

Sunday, January 18, 2009

Carousel Treat Holder


I must say that I am addicted to boxes and candy covers. This one is really simple to make and can be used for many different things - candy, cocoa or coffee packets - you name it.

Birthday Hat Box


Here is a cut file for a Birthday Hat shaped box made with the Cricut and GBS cartridge. It has a side opening and can hold tiny treats inside. I also posted a picture of the scoring lines, as this may help in assembling the box.
The box is a side closure - so you can load in your goodies in the back of the box - the basic instructions are you will glue the bottom tabs on each side (for a total of 4) with a good sticky glue (I use Terrifically Tacky Tape). Do not glue the one front tab on the bottom as this will line up with the back closure. Now just load your goodies and insert the back tabs into the slots. Do not glue the side of the box! I tried one and loaded Hershey Nuggets into mine and it held up great! Also there is a straight strip on this file - it is just another option for a brim - maybe more masculine -
Boxes - My birthday hat box.cut

I hope you like!