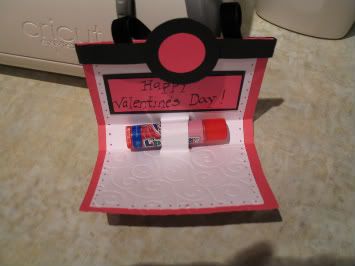
and then you open and viola...
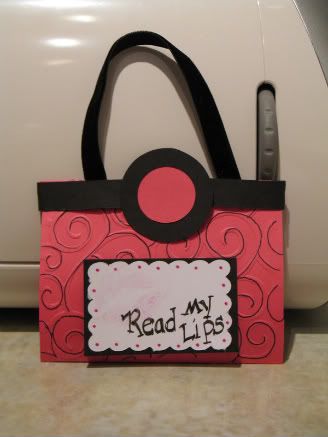
This design is NOT mine and thus I CANNOT take credit for the creativity... but I did make it easier to make by creating a cut file. I think it is cute for chapstick, but I could also see those tiny tubes of perfume inserted through the slits too!
Here are some basic instructions for assembling:
After cutting out the pieces, score the outer layer on the long edge at 1/2" and 3 1/2" then flip card and score the opposite end at 3".
For the inner layer (the part for the chapstick) score at 2 3/4" from each of the sides.
Next fold down the 1/2" top, adhere your purse handles, then adhere the band over and around it. Use the circle layers to cover your seam. (Now the bottom half of the purse will tuck inside this).
Glue together your inner and outer layers BUT be careful NOT to glue the section that will hold the chapstick. Gently insert your chapstick as the paper slits will tear easily. These have to be snug enough to keep the lip balm from sliding out. Now you can embellish as you see fit. (Although you MUST apply lipstick and put the lips on yourselves! LOL)
4 comments:
hi Cindy
This realy is a cute card, great idea. Thanks for sharing.
Take care Linda from Holland
I can't wait to try this! I think I'm going to make the slits a little bigger and put a pack of gum in for my daughter's college swim team-mates. I'll let you know if I suceed! Thanks for sharing!
My daughter's roommate is a "chapstick ADDICT!" Can't wait to make this for her.
I did it! Thank you so much for sharing this file! I made the slits bigger for a pack of gum and made 35 of them for my daughter's college swim team for Championships! I'll link your blog to my blog post! Thanks for the inspiration!
Post a Comment